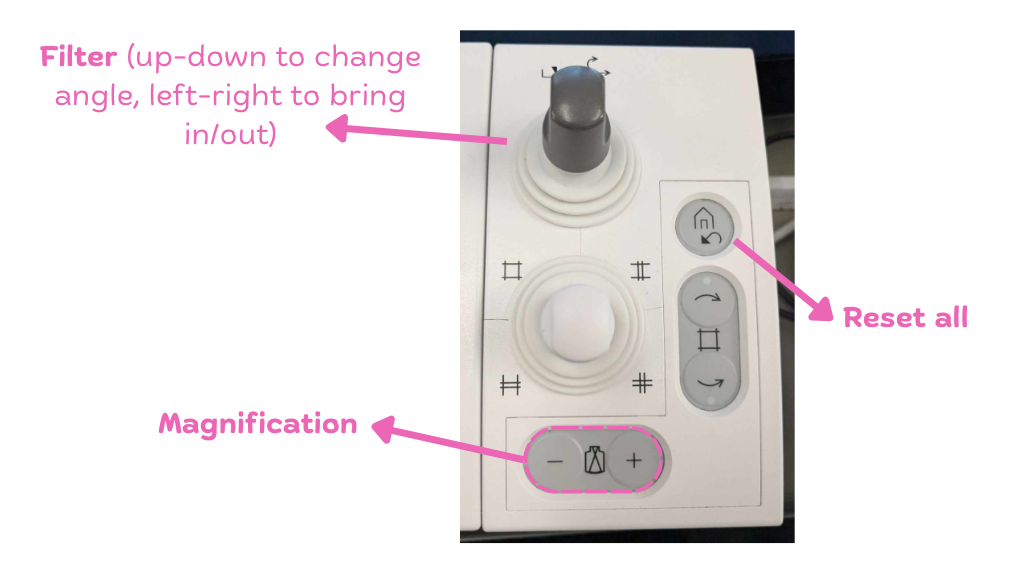
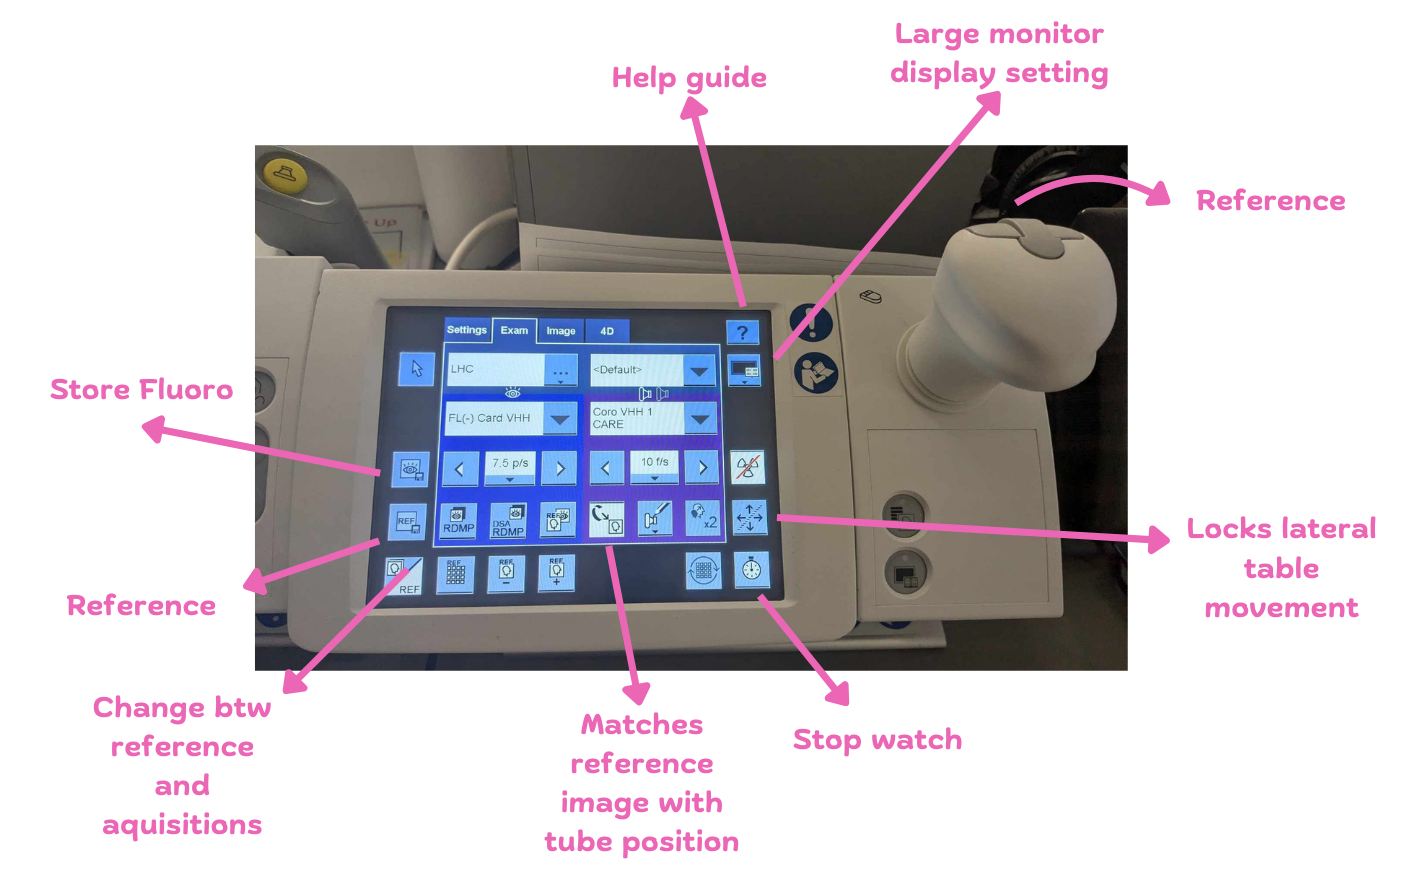
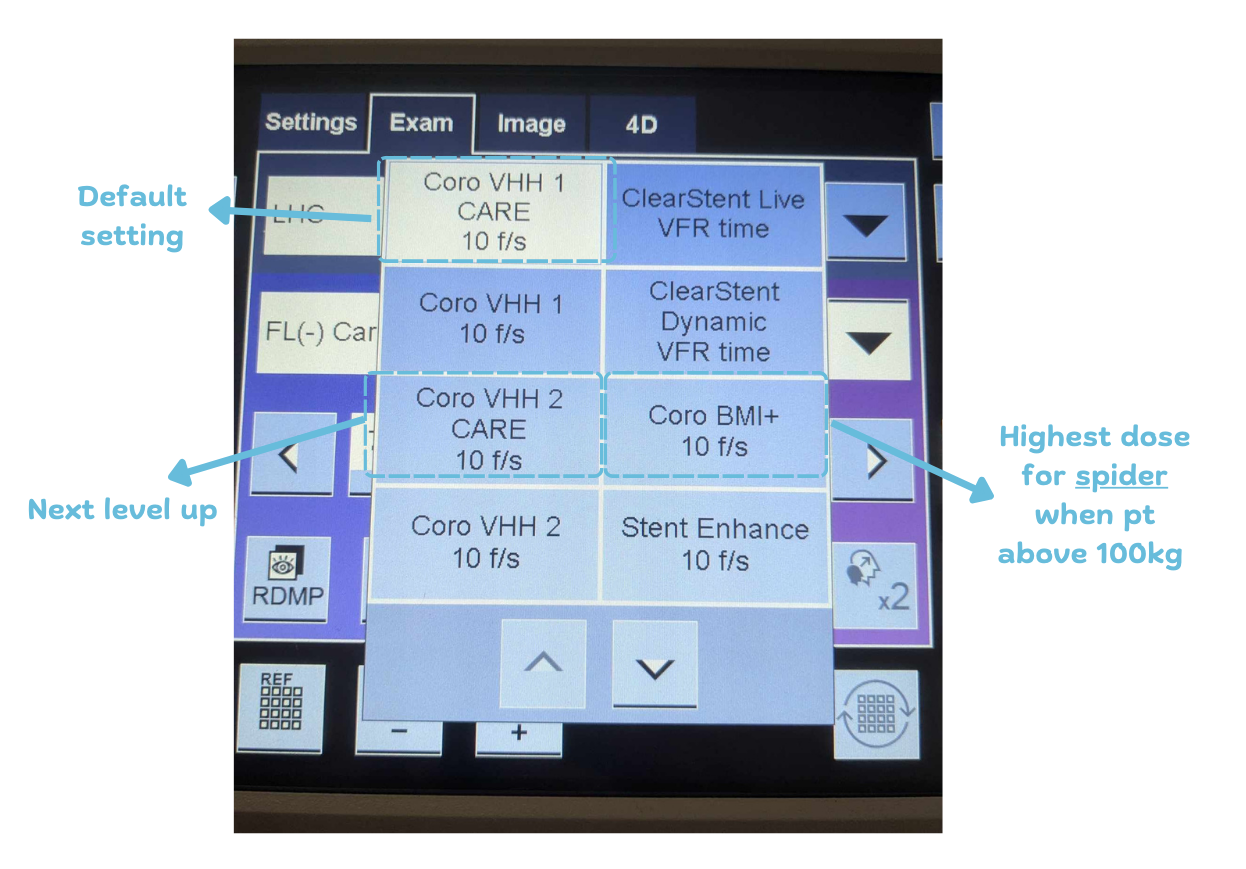
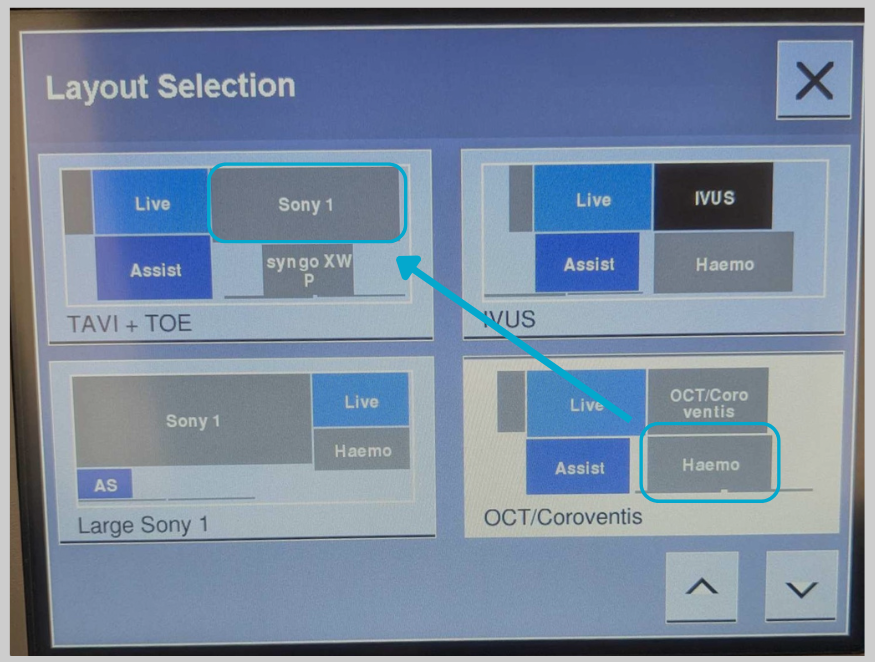
Equipment

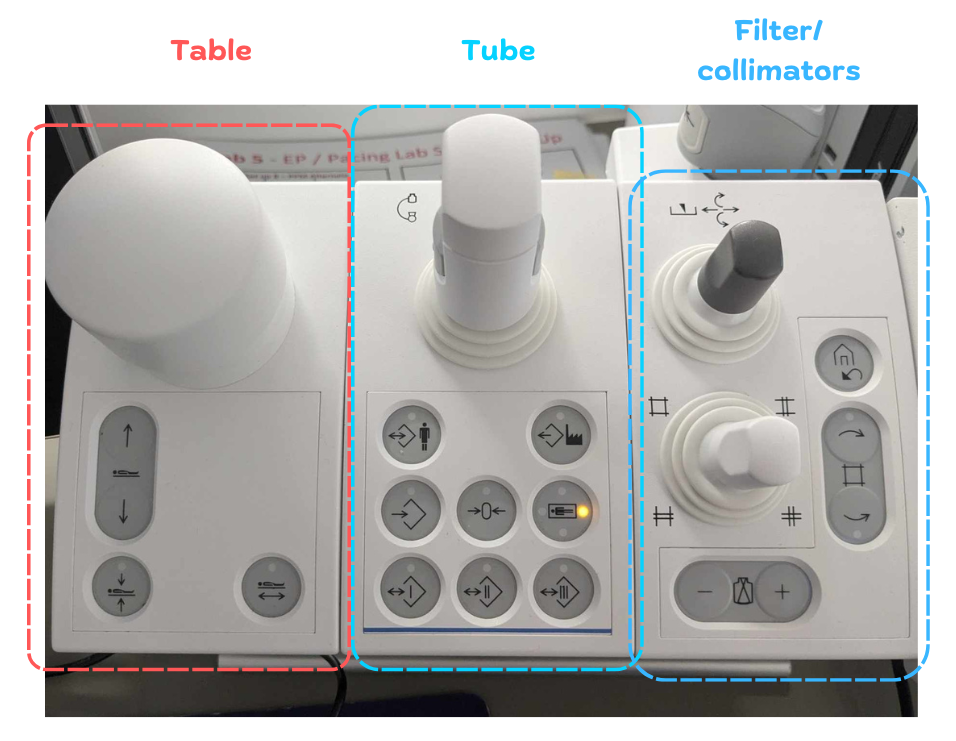
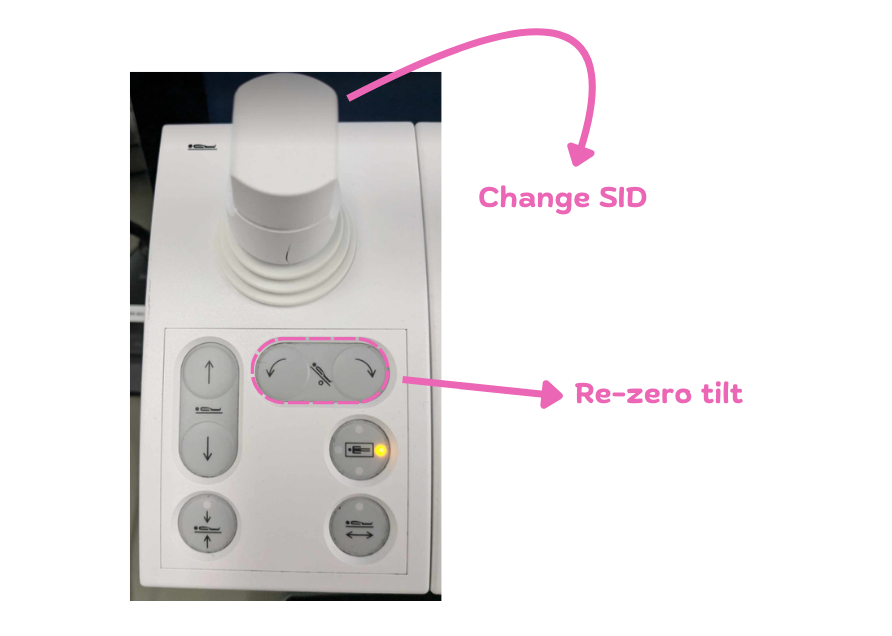
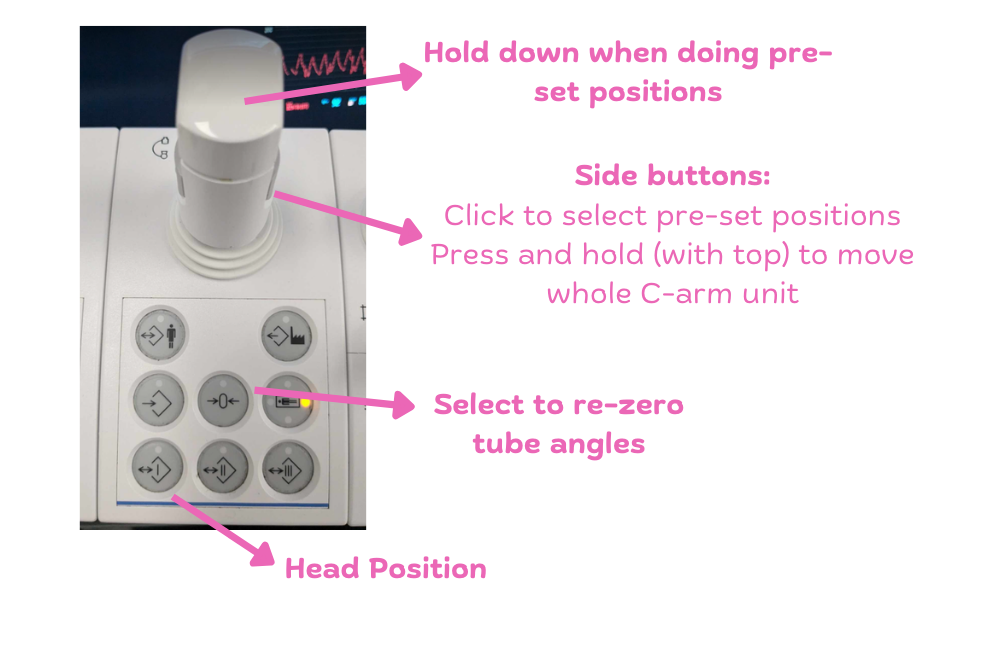
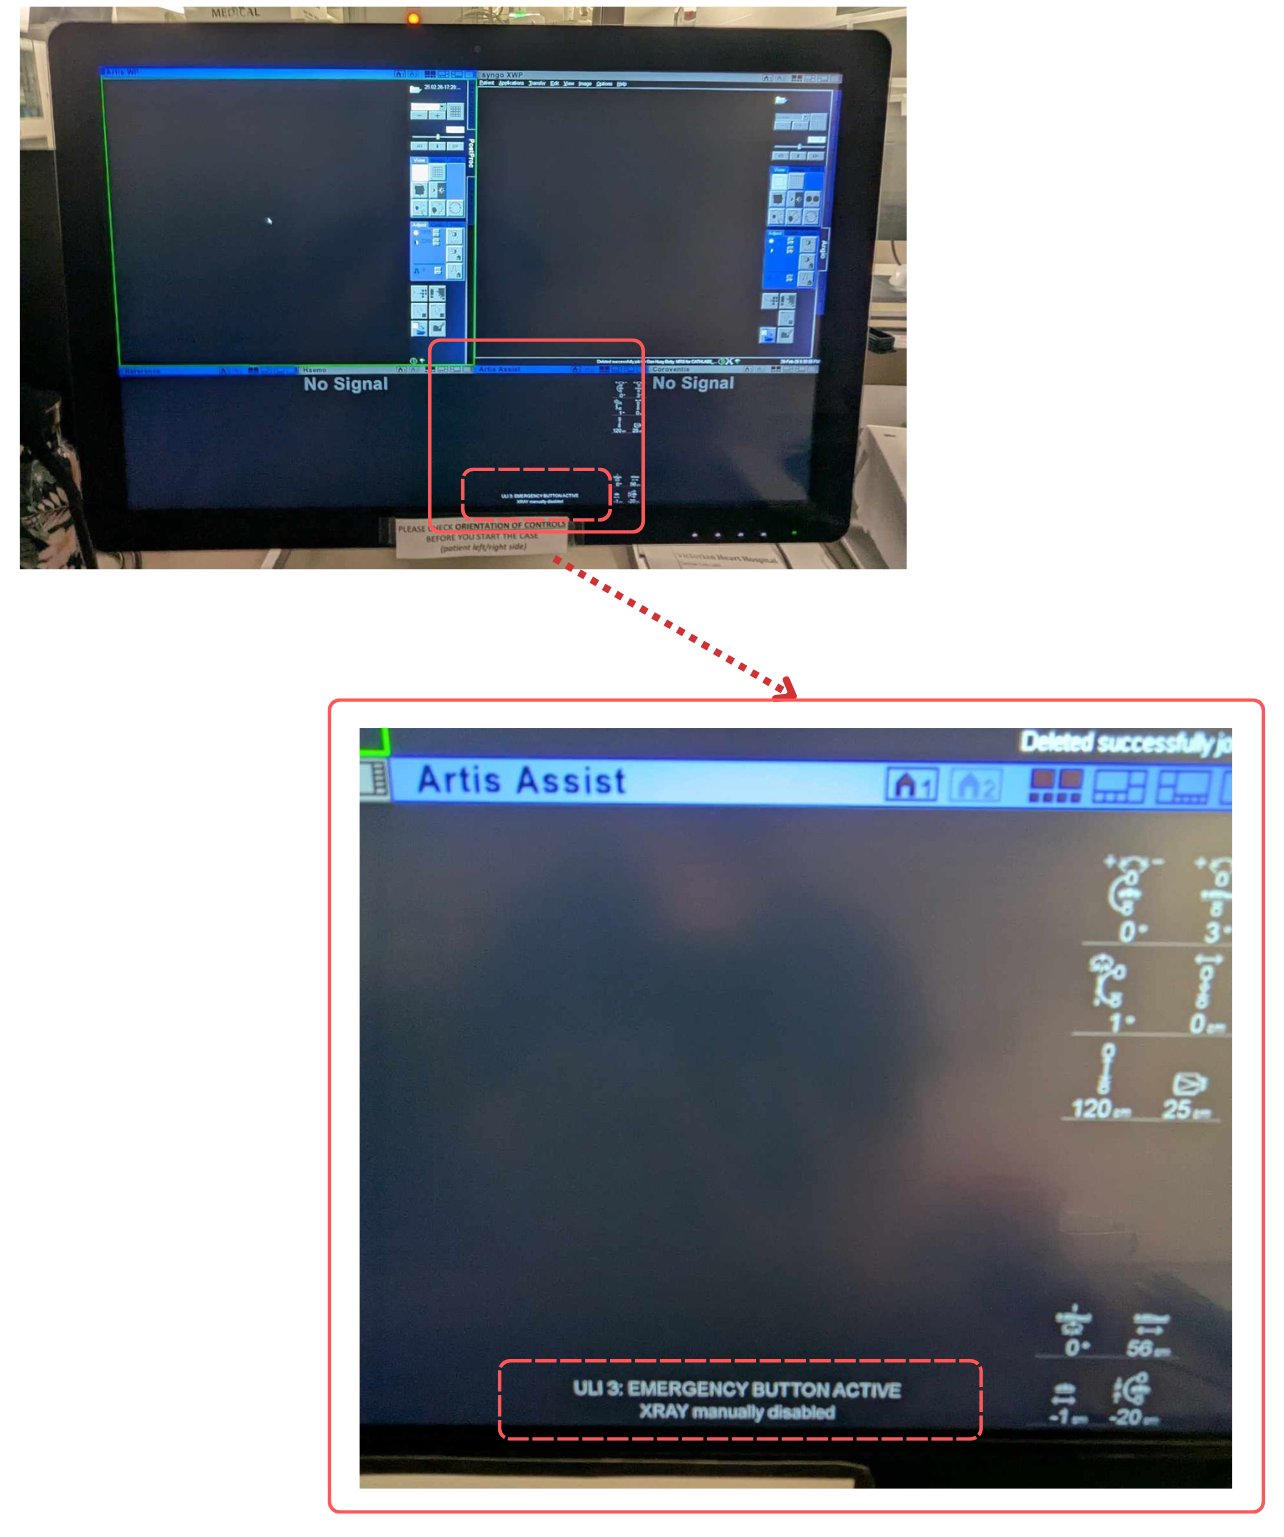
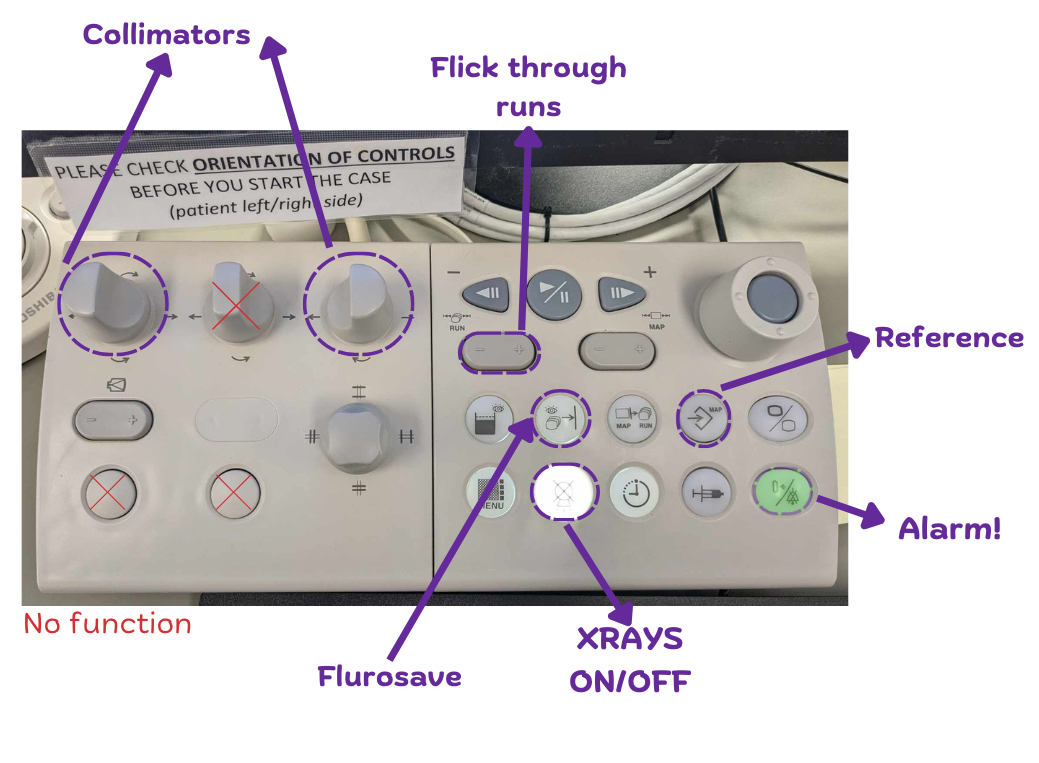
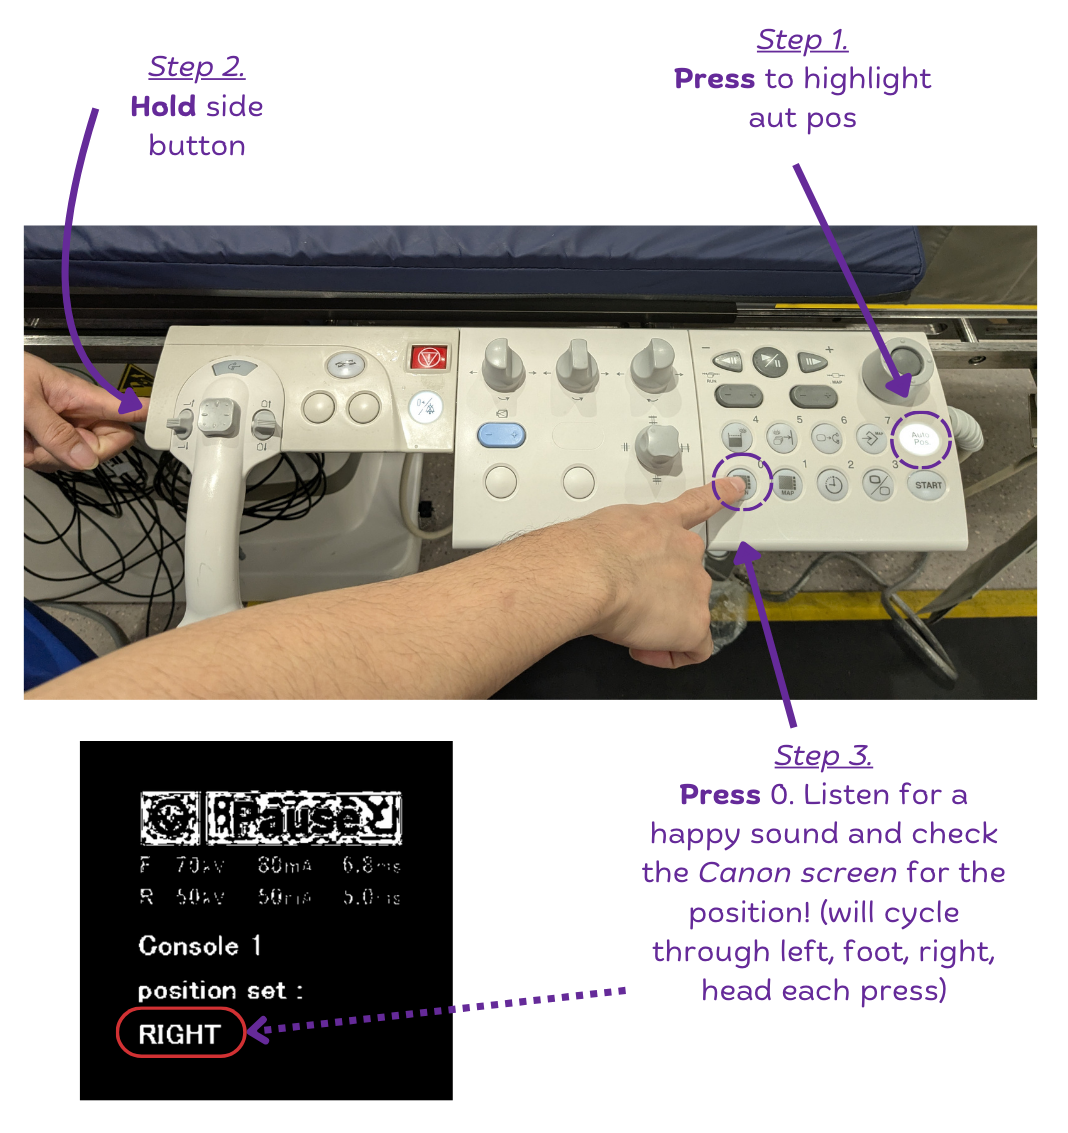
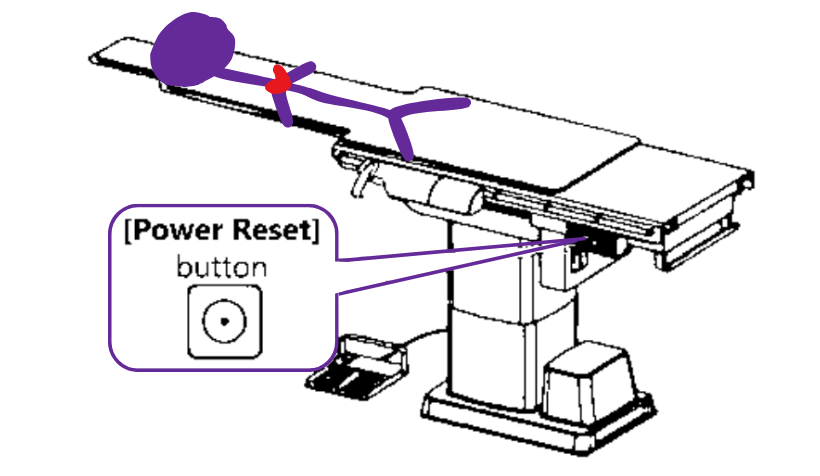
Familiarise yourself with the equipment you are responsible for assisting with during examinations (especially the tube/table if you haven't been trained in fluoro). You will learn as you go, but have a basic understanding of the different machines you will encounter and for what purposes. Be sure to check out the troubleshoot section when things get out of rhythm!

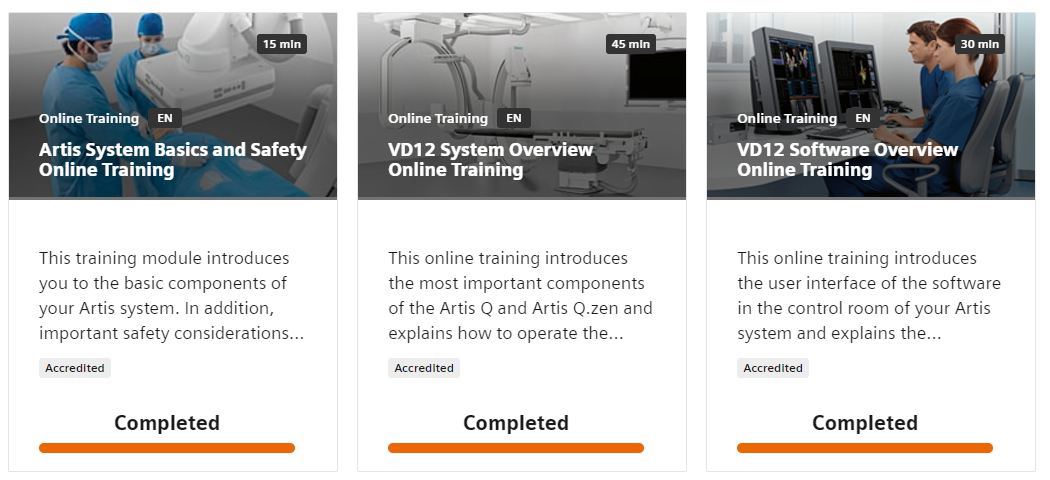
For Siemens, check your email for the Siemens PEP Connect link or make an account and complete these 3 modules:

Siemens Image

Siemens/Syngovia Computer

  • Turning off: Make sure you turn off XWP first, then turn off the Siemens Artis Q (otherwise XWP will not be turned off properly/hard shutdown)
  • Turning on: No specific order. The tube/whole system will turn on when you turn on the computer.

Control Module

Table_controls_eq3

Table

  • Hold both tilt buttons to re-zero back to 0 tilt.
  • Hold down the orientation button to change. Make sure this matches where the console is! (Otherwise, the machine will not move as expected.)
Table_controls

Tube

Auto/Preset Movements
  • Hold and push joystick forward to get a list of presets. Push to 'scroll' through them.
  • Select the desired position by clicking side buttons.
  • Hold and push forward to move into position.
  • Will appear on assist screen as moving into target position or movement completed.
Manual Movements
  • To move the whole C-arm unit back/forward and angle, push down whilst pressing side buttons.
  • To tilt the C-arm into cranial/caudal and RAO/LAO, just push down.
  • Back of the joystick has up and down buttons to change SID (be careful of hitting pt).
  • Reset filter/collimators by pressing down.
  • Magnification button on bottom right (start with 25 prior to engaging then drop to 20 once beginning to acquire in artery).
  • Final clean: rotate whole C-arm to lateral to clean bottom easier.
Table_controls_eq2
Table_controls_eq3

Screening (Fluoroscopy and Acquisitions)

Table_controls

Fluoroscopy (left side)

  • Depending on cardiologist, may go down to 4p/s or 6p/s (lower p/s means the imaging will be less smooth, but save dose).
  • Ensure the bottom RDMP buttons are NOT selected (or else the reference image will overlay live image).
  • Default: stay on lowest setting (FL -).

Acquisitions (right side)

  • May increase to VHH 2 or Coro BMI+ for the spiderview in large pts > 100kgs (going through dense area and at a steep angle).
  • Select the C-arm button to automatically display the reference image based on the tube position (only works with limited ~5 reference images so try not to save too many rubbish references!).
  • For LV and aortograms, increase to 15 f/s for better image quality.
  • When dose is getting high: reduce by using less angle, collimating in, reducing OID or reducing frame rates.
Table_controls

Canon

  • Mostly set up for PPMs - controls on left side.
  • Table and tube can only be moved from inside the room!
  • When starting an examination, make sure to also start the dose calculation screen for PSD!
  • Switch between screens using ALT + space
  • Don't finish/close pt until you record the doses!
  • canon_controls

Contrast Injector

  • The injector is typically controlled by the nurses who are already leaded-up in the room.
  • Only in room 4 is the injector screen outside and we have to set up the parameter! Otherwise, if you know the injector will definitely be used (e.g. TAVI) feel free to set it up! (Just ask the nurses - "hey are you happy for me to set up the injector for the next case?")
    • First select protocol, still checking with cardiologist what rate, volume, and PSI they want (ask exact numbers, not just 'protocol/preset' as each radiologist has their preference).
    • For arteries, PSI will never exceed 300 (risk of perforation).
    • Ensure ISI is on if injecting and acquiring automatically and not by hand-injection.
    • Check for error stating need to re-wind syringe to remove air - make sure to let nurses inside know!
  • Make sure to end case on the screen once completed (will reset volume used/injected to start fresh for new pt).

Sony Screen

  • Ensure correct pt and cardiologist is selected (otherwise select unknown top right corner).
  • Click finish once case is done.
  • May be (very rarely) used to record the case (so make sure each time the correct pt/dr is selected).
  • The sony screen is the ultimate control panel, for cameras (3 in each room which you can angle to where you want), other external devices (e.g. TOE/US).
  • Sony 1: Can put ANYTHING you want on this screen as long as it is connected to the system or automatically exists in the system (e.g. Haemo, TOE/US, camera etc. )

Troubleshooting

Check the bottom of the Artis Assist screen for any errors to do with the table/tube. If at anytime you are unsure, ask the supverisor for help! (Call 12243 or ask someone to help you find them)

Table Not Moving

  • Re-zero tilt (even 0.4 degrees tilt which will appear as 0 on the screen will affect table movement).
  • Ensure lock is not selected on the touch screen.
  • Check bedside and our emergency brakes are not on.

Tube Not Moving

  • Monitor sensors activated on roof railings - guardrail activated
  • Tube sensors activated/pressing on something.
  • 'Collision with pt': hold down preset position buttons 1 and 2 to manually move the tube - make sure someone in the room is checking tube is actually not hitting anything

Reset Machines

  • While holding preset buttons 1 and 2, press emergency button.
  • Wait a few seconds before releasing the emergency button.

  • Restart!
    • Absolute final resort.
    • Put table/tube in safe position first.
    • Let cardiologist know the table/tube will not be able to be moved for the next 10-15 minutes during restart.

Main monitor not working

  • Don't panic
  • Use the Sony Nucleus to see what they are doing via the Left CR and Right CR screens
  • Use the tube/table control modules to reference, fluorosave etc.

Incorrect pt details/examination

  • Only correct once finished (otherwise half will be correct and half will be wrong; very hard to fix!)
  • Let a supervisor know and they will contact PACS

Not opening patient before beginning screening

  • Only correct once finished (otherwise half will be correct and half will be wrong; very hard to fix)
  • DO NOT close the pt after finishing
  • On Syngo WP screen, enter the details of the patient, accession number (e.g. VHH25), check the vertical tabs to ensure all necessary info is added.
  • Double-check details are correct
  • Send 1 image/run to Intellispace. If it is in the correct folder, then send the rest.
  • For the dose report, go back to the Artis screen and enter the pt height/weight.
  • Send to the Syngo WP screen and drop into the correct pt folder. No PSD will be recorded.

Accidentally adding EMR radiation dose and protocol

  • Cannot be deleted unfortuantely, it is what it is.
  • Add a note stating 'Radiation not required' at the top and sign
  • Mark as 'in error'

Computers suddenly turning off

  • Check isolation buttons are not accidentally being pressed! (Common when consultant is sitting on the side with chair brushing buttons on the wall!)
  • Manually turn on/off; PC is behind the monitors on the top right side.